
7 Acrylic Laser Engraving Tips Every Designer Should Know
Avoid Common Mistakes and Achieve Flawless Results with These Practical Laser Engraving Tips for Acrylic

Working with acrylic can be incredibly rewarding—when it goes right. But as many designers and makers soon discover, acrylic laser engraving isn’t always as smooth as it seems. From poor contrast and unwanted burn marks to inconsistent results, there are a few common snags that can frustrate even experienced creators.
This post breaks down seven acrylic engraving tips that actually help—based on real-world issues we've seen time and time again. If you're tired of trial-and-error and want cleaner, more professional results, these practical pointers are for you.
Choose the Right Type of Acrylic
Here’s something many people miss when they’re new to acrylic laser cutting: not all acrylic sheets are the same. This one detail can make or break your project.
There are two main types—cast acrylic and extruded acrylic—and they respond very differently to a laser. Cast acrylic is ideal for engraving because it turns frosty white when marked, offering strong contrast and crisp detail. Extruded acrylic tends to melt under the laser, often leaving behind rougher or uneven engravings.
Tip: If your design involves detailed engraving or cut lettering, always go for cast acrylic. It delivers cleaner, more professional results during both engraving and laser cutting.
At RazorLAB, we regularly work with both types, and we’re happy to recommend the best option for your project. Whether you're engraving logos or producing cut-out signage, choosing the right acrylic is the first step to successful acrylic laser cutting.
Dial In Your Laser Settings
One of the most frustrating things for designers is inconsistent engraving depth and finish. Nine times out of ten, this comes down to incorrect laser settings.
If the speed is too high or power too low, you’ll barely scratch the surface. If the power’s too high, you risk melting the acrylic, leaving behind tacky edges or warped text.
Tip: Do test runs on off-cuts to fine-tune your settings. Lower power and higher speed usually give the best engraving results on cast acrylic.
Working with professionals like RazorLAB takes the guesswork out—our team knows exactly how to calibrate settings for clean, precise results every time.
Clean Before You Cut
This one’s simple but often ignored. Even a small amount of dust, oil, or residue on your acrylic sheet can interfere with engraving, causing streaks or inconsistent markings.
Tip: Always clean the surface of your acrylic with a soft cloth and isopropyl alcohol before laser engraving.
We recommend this step even if your sheet looks clean—it makes a surprising difference.
Mask to Prevent Smoke Stains
One issue that really annoys makers? Smoke stains. During laser engraving, smoke can leave behind yellow-brown marks around the edges of the engraved area—especially on lighter or clear acrylics.
Tip: Use masking tape (low-tack) on both sides of the sheet to protect the surface. The laser will burn through it, but the tape will absorb most of the smoke, keeping your final result crisp and clean.
At RazorLAB, we can apply masking as part of our service—just let us know your requirements when uploading your design.
Consider Reverse Engraving for Clear Acrylic
If you’re working with clear acrylic and want the design to be viewed from the front without the engraved surface being exposed, try reverse engraving.
Tip: Mirror your artwork and engrave on the back of the acrylic. When viewed from the front, the design appears crisp and protected behind the smooth surface.
This technique is especially useful for signage or awards and helps preserve the polished look of your final piece.
Don’t Overlook the Importance of Vector vs Raster
It’s easy to get carried away designing in your favourite software, only to discover your artwork isn’t laser-ready.
Tip: For engraving solid areas, use raster graphics. For clean outlines or single-line artwork, use vector paths. Knowing when and how to use each will save time—and prevent unexpected results.
If you’re unsure how to prep your files, RazorLAB’s design support guides and friendly team can help make sure your files are ready for smooth processing.
Always Do a Small Test Engraving First
No matter how experienced you are, this is a golden rule. Acrylic sheets can vary slightly between batches, and different designs can behave differently on the same material.
Tip: Test a small section of your artwork on a spare piece of acrylic—or in a discreet corner—before committing to a full run.
This simple step helps you avoid wasting materials and ensures your engraving looks exactly as expected.
Final Thoughts
Laser engraving acrylic is an art that combines creative skill with technical know-how. The smallest adjustments can make the biggest difference—from choosing the right material to dialling in your settings and cleaning the surface.
At RazorLAB, we’ve been turning digital designs into reality since 2009. Whether you’re a hobbyist or a professional designer, our online laser cutting and engraving services are trusted across the UK for a reason. We know acrylic, and we’re here to help make your project shine—without the guesswork.
About the Creator
RazorLAB
RazorLAB provides versatility of Laser cutting & Engraving services! Our team of skilled professionals can handle a wide range of projects. We specialize in four distinct materials for custom projects like acrylic, wood, fabric & card.
Australia Imported 2,400 Toads to Save Its Crops—Now 200 Million of Them are an Unstoppable Disaster
In 1935, Australia made a decision that would later be described as one of the most disastrous biological experiments in modern history. To protect sugarcane crops from destructive beetles, the government introduced 2,400 cane toads from Central and South America. The idea was simple: let nature handle the pests.
By Sajida Sikandar4 days ago in Journal
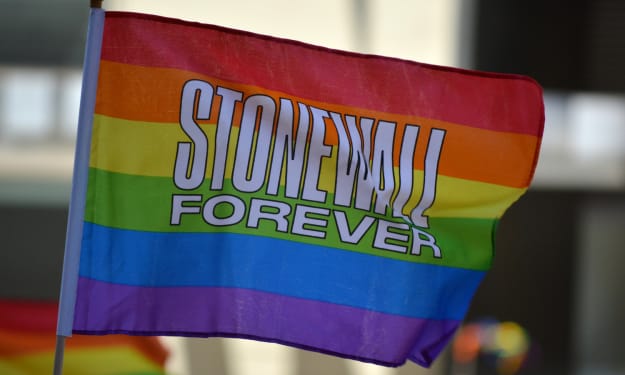
The Pride Flag and the Diversion
For nearly a decade, the LGBTQIA Pride Flag rippled in the wind at Christopher Park, a kaleidoscope of color staked into the soil of America’s first national monument to LGBTQIA+ liberation. That flag came down this week. Federal officials, citing new guidance from the Trump Administration, silently lowered the rainbow flag from its pole across the street from the Stonewall Inn. The birthplace of the modern gay rights movement now flies only the United States flag.
By Tim Carmichaelabout 19 hours ago in Pride


Comments