
How to Apply Plaster for Long-Lasting, Smooth Walls and Ceilings
Preparing the Surface Before Plastering
Plastering is an essential step in creating smooth, durable, and aesthetically pleasing walls and ceilings. Whether you're renovating your home or working on a new build, applying plaster properly ensures a long-lasting finish. In this article, we will guide you through the process of applying plaster for a smooth and long-lasting result.
For those looking for professional plastering in Ripon, this guide provides tips to help achieve a flawless finish. Let’s dive into the steps and techniques required to apply plaster like a pro.
Preparing the Surface Before Plastering
Before you begin the plastering process, proper preparation of the surface is crucial for ensuring the plaster adheres well and provides a smooth finish. Here are the key steps to take when preparing the surface. Plastering is very important for building and home finishing.
Clean the Walls and Ceilings
Start by ensuring that the walls or ceilings are free from any dust, dirt, or grease. Clean the surfaces with a damp cloth or sponge to remove any debris. This prevents any contaminants from interfering with the plaster’s adhesion.
Repair Any Holes or Cracks
Inspect the surface for any visible cracks, holes, or uneven areas. Fill in these imperfections with a suitable filler or patching compound. Allow it to dry completely before you start plastering.
Apply a Bonding Agent (If Necessary)
If you are plastering over a smooth or non-porous surface, it may be necessary to apply a bonding agent to help the plaster adhere better. This is especially important when plastering over surfaces such as tiles or old, glossy paint.
Mixing the Plaster
Now that your surface is prepared, it's time to mix the plaster. Ensure that the plaster is mixed properly to achieve the right consistency. The consistency is important for the plaster to apply evenly and smoothly.
Follow Manufacturer’s Instructions
Always refer to the manufacturer's instructions when mixing the plaster. Most plasters need to be mixed with a specific ratio of water, so it’s essential to follow the guidelines carefully.
Achieve the Right Consistency
The plaster should have a smooth, creamy consistency—not too runny or too thick. It should be easy to spread but firm enough to stay in place as you work.
Applying the Plaster
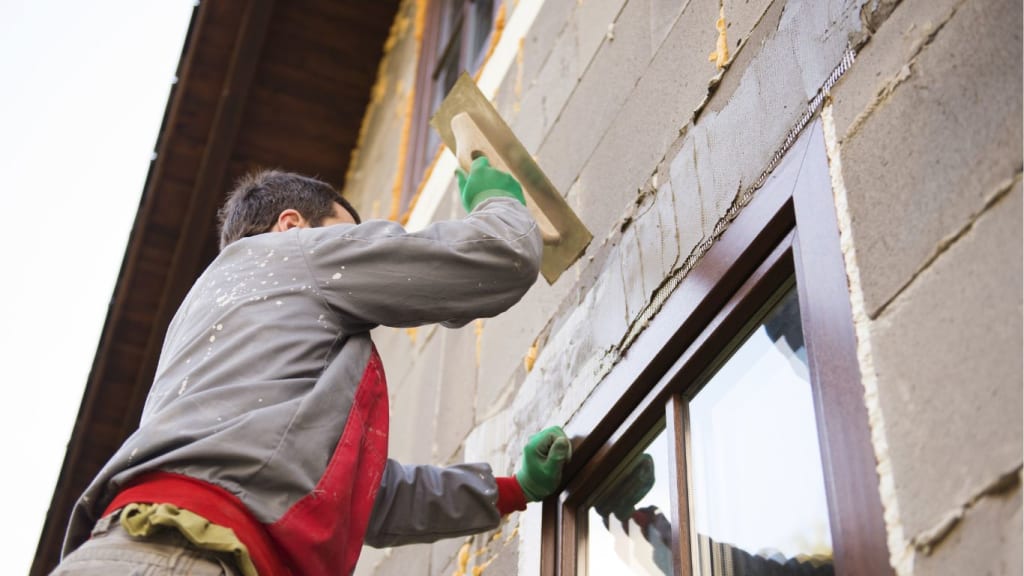
With your plaster mixed and your surface prepared, it's time to start applying the plaster. For smooth, long-lasting walls and ceilings, it’s important to apply the plaster in multiple thin layers.
First Coat: Apply a Base Coat
Start by applying a thin layer of plaster using a trowel. Use a technique that involves spreading the plaster evenly across the surface in smooth, upward strokes. Be sure to cover all the areas, but don’t overapply plaster at this stage. The goal is to create a base coat that provides an even foundation for the subsequent layers.
Allow the first coat to dry and harden before continuing.
Second Coat: Smooth Out the Surface
Once the base coat is dry, apply a second coat of plaster to even out any imperfections and ensure a smooth finish. This layer should be applied slightly thinner than the first coat, but it should cover the entire surface.
Smooth out the plaster with a trowel as you go, ensuring there are no lumps or uneven sections. You can use a straightedge or level to help smooth out larger areas.
Final Coat: Achieving a Glass-like Finish
The final coat is the most crucial for achieving a smooth, flawless finish. Once the second coat has dried, apply a very thin layer of plaster to create a smooth surface. Use a trowel to achieve the desired texture. Be patient and work slowly to avoid any imperfections.
Wet the Surface if Necessary
To get a truly smooth finish, you may need to lightly wet the surface with a damp sponge or trowel to help smooth out any lines left from the trowel.
Finishing Touches
Once you’ve applied all the coats of plaster and achieved a smooth finish, it's important to let the plaster dry thoroughly before decorating.
Sanding the Surface
After the plaster has fully dried, lightly sand the surface with fine sandpaper to remove any rough spots or imperfections. Be careful not to over-sand, as this can damage the smooth finish.
Cleaning Up
After sanding, clean the area of any dust and debris. You can then proceed to decorate the walls or ceilings as desired.
Why Choose Professional Plastering in Ripon?
While plastering is a skill that can be learned, it can be tricky to master. If you want the best results and a flawless finish, opting for professional plastering in Ripon can save you time, effort, and money in the long run.
Professional plasterers bring years of experience to the table, ensuring a smooth, durable finish every time. They use the latest tools, techniques, and materials to get the job done quickly and efficiently. Whether it’s for a home renovation or new construction, expert plastering will make all the difference in the final appearance of your walls and ceilings.
Conclusion
Applying plaster is an essential skill for achieving smooth, durable walls and ceilings. With the right preparation, technique, and patience, you can create a flawless finish. However, if you're looking for the best results or simply don’t have the time to do it yourself, consider hiring professional plastering in Ripon for a job well done. By following these steps or seeking expert help, you'll ensure your walls and ceilings are smooth, long-lasting, and ready for decoration.


Comments
There are no comments for this story
Be the first to respond and start the conversation.